Budget tripod shootout, part 1

Pro photography equipment is expensive — this shouldn’t be a news flash if you’ve shopped for gear for more than twelve seconds. For real pros, it’s a no-brainer to buy the best equipment available. The high-end stuff from most manufacturers tends to be remarkably reliable, durable, and it offers the best possible performance. If you’re making a living from photography, you’ll rarely consider anything less than pro gear.
For hobbyists on a budget, though, equipment purchases are all about compromise. Choosing an entry-level product vs. a pro product or choosing a third-party manufacturer can free up a lot of budget room — in some cases enough to make the difference between making a purchase or putting it off. Common wisdom suggests spending big on lenses and pulling back a bit in other areas, but at what point does that start to break down? Is there a point where penny-wise clearly turns to pound-foolish?
In the case of tripods, I do believe there is, yes. I’ve gathered three budget tripods, and I’ll compare capabilities and features of each of them to help you see what you get for your money as you change price points at the low end of the scale. The assumption here, of course, is that if you’re spending pro money on a tripod, you should have comparatively little trouble finding a great product to meet your needs.
How to compare capabilities
When it comes to equipment comparisons, we’re ultimately comparing the features and prices of one or more competing products. All things being equal, we’d prefer to pay the least we can in order to obtain the features we need. When comparing these features, then, I find it’s helpful to pay attention to whether you’re looking at discrete inclusions / exclusions, or differences in quality between two products.
In a camera body, for instance, weight, button locations, frames per second, and even capabilities like ISO range are largely qualitative differences, but if I’m comparing a Canon 40D to a 7D, for instance, there’s just no way to shoot videos on a 40D. If that’s a quality I value, then, this makes my choice a bit easier. I’ll try to point out differences among these tripods with this in mind, because there are absolutely some places where capabilities just don’t exist at all in some of these kits.
The contenders
In this roundup, I’m going to look at the following tripods, all of which are considered “entry level”, but which offer very different capabilities to the photographer.
Velbon CX-300. I got this lightweight tripod free with a camcorder I purchased a dozen or so years ago. It was worth every penny.
Dolica Proline AX620B100. This was something of an impulse buy, at around $40, and it was an immeasurable improvement over the Velbon.
Induro A113 / SA01. My most recent purchase is an entry level tripod from a top-tier tripod manufacturer – I’m anxious to see how it stacks up against the other two.
Velbon CX-300: Better than nothing?
 The Velbon CX-300 tripod is typical of the cheapest sort of tripod you can lay your hands on at department stores, big-box stores, and electronics chains. Expect to pay around $20-40 for this tripod, or find it thrown in for free with a bundle of other assorted crap when you buy a new camera or camcorder (mine came with a camcorder I bought over a dozen years ago).
It’s true that I’m not a fan, despite the fact that I used my Velbon for a dozen years or more before upgrading. There are lots of these sorts of tripods around though, so I think it’s only right to give it a good fair look. In that spirit, then, I’ll start out by pointing out some of the strengths of this sort of tripod:
- It’s light.
- The flip-lock legs are really easy to use.
- The extra bracing mid-leg gives the tripod much more stability than it would normally have, given its ultra-cheap construction.
- The pan-tilt head is much better at panning than some entry-level ballheads.
The CX-300’s big weaknesses start with some major features you’ll give up in this tripod versus the next step up:
- Independent angle adjustments on the legs. If you ONLY shoot indoors, this might only be a minor inconvenience, but for everyone else on the planet, you’re going to want to angle each leg on its own to adjust to the terrain. In its defense, the length of each leg on the Velbon is adjustable as you can see here.
- No quick-release system.
- Replaceable head. Let’s say, for the sake of argument, that you tire of the pan-tilt head design on this Velbon, or if you discover that the mounting platform on this head really isn’t quite level, forcing you to constantly play with the height of the legs in order to take a level shot (don’t worry — I’m sure that was just a fluke with my copy). You might be tempted to replace the head and keep the legs of this Velbon kit, but you can’t do that, sadly.
Construction and Specifications
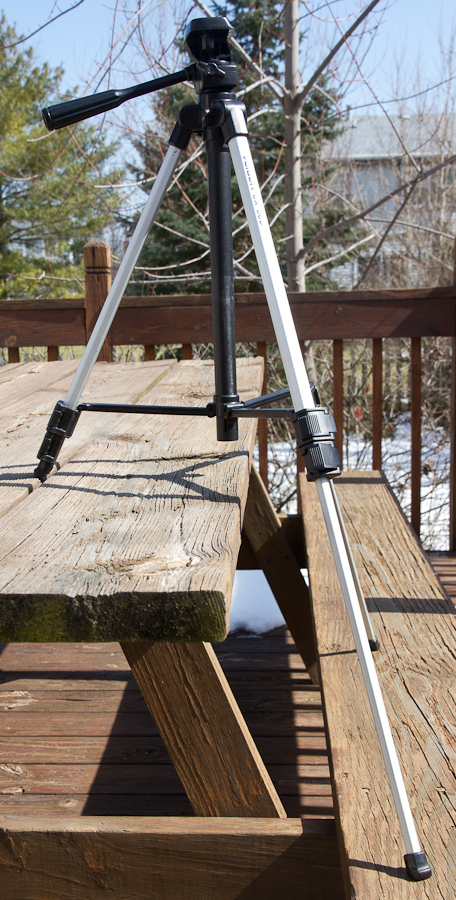
The CX-300 is made mainly of lightweight aluminum and plastic. The legs are formed into a sort of flattened oval, which keeps them from turning. This is generally considered preferable, and in this case, it keeps the rubber feet at the bottoms of the legs oriented so that their base contacts the ground. That angle also underscores one of the other major operational aspects of the tripod — the legs are either open or closed, and when they’re open, they open to a single angle only such that the bracing at the bottom of the first leg segment locks into place.
The leg locks and spider (where all three legs come together) appear to be made entirely of plastic, but it seems to be a fairly durable plastic, since I’ve yet to break any part of it in my years of dragging it around. The legs and center column continue to work smoothly, as well — no troubles with pieces loosening up or dirt gumming up the works.
One of the advantages of the extra leg reinforcement is that this tripod is functional despite its very light weight — at less than 2.5 pounds, this tripod is a breeze to carry. With all its legs retracted, it’s around 20″ in height, and I measured 45″ with legs extended and just under 57″ when the center column was also extended. This is a shade on the short side, especially if you leave the center column down (which is highly recommended).
Operation
The legs of the CX-300 extend via flip-locks, which I’ve always preferred slightly over twist-locks. Since the legs still extend smoothly after years of operation, I’m usually able to loosen all three joints with one motion, then lock each of them at its joint. Total time to extend all three legs is on the order of fifteen seconds. A knob on the spider loosens the center column, which you can position where you want before re-tightening. I’ve seen tripods of this design that have a geared center column requiring you to crank a knob to raise and lower the column. Avoid these if you can.
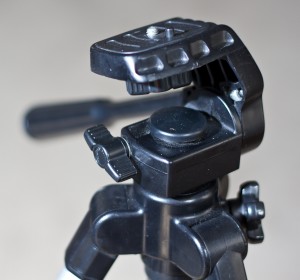
 The pan-tilt head on the CX-300 is one of its most distinctive features, and it’s one of the clues that this tripod is really more targeted at video shooters than photographers. Unlike most photo tripods, which use a ballhead, the pan-tilt head on the CX-300 is easily adjusted so that it can move side-to-side (pan) or up-and-down (tilt) independently. This leads to one of the CX-300’s few saving graces for photographers — it’s a pretty decent platform for panoramas, provided you can get the base level. Unfortunately, as I mentioned earlier, my copy either came with or developed a small lean in the head, so that it was nearly impossible to get any individual shot level.
Another common gripe with this head is that you can’t shoot in portrait orientation with this head. In fact, it is possible if you tilt head up 90 degrees and rotate the camera on the mounting plate, but this is a fairly obtuse way of getting from point-A to point-B that’s lost on a lot of the photographers who own these tripods, and even once you know how to do it, it’s pretty inconvenient.
 As I indicated earlier, there’s no quick-release built into this head, which is also a huge inconvenience once you know what you’re missing. Most tripods, as we’ll see when we look at the Dolica and Induro, have a mounting plate that accepts a matching plate that mounts to the camera so that attaching the camera to the tripod takes only a second or two. The Velbon’s more conventional mount is nearly universal, which is good, but there’s no quick-release plate here, and no good way to mount a third-party plate. Given some persistence and a range of plates to choose from, you might find a plate that works (see the Giottos 652 plate at right, mounted with the aid of a 3/8″-to-1/4″ adapter), but it’s definitely not optimal, and you should also be aware that you’re going to pay about as much for the quick-release plate as you did for the tripod in the first place.
Performance
Ultimately, the reason you’re using a tripod is to position and steady your camera. The Velbon CX-300, it turns out, isn’t too bad at steadying your camera as long as you can live with the rather severe constraints it imposes on positioning it. To begin with, you really want to avoid extending the center post on the CX-300, as this really introduces quite a bit of vibration to the platform. Of course, this implies that your tripod is now effectively limited to about 45″ of height.
The fixed-angle leg mechanism also means that your ability to position the tripod on uneven terrain, or even steps or other uneven surfaces, is pretty limited. This is honestly one aspect of tripod operation I never really questioned until I saw how the flexibility of independently-adjustable legs would impact my tripod use. In short, if you’re nearly always setting up on flat, level ground, then the legs of the CX-300 probably won’t bother you a bit.
Operation of the pan-tilt head is simple and easy to learn, but the head struggles to hold a camera exactly where you want to position it. I found that in both pan and tilt directions, the camera would continue to move slightly after I tightened it into place. Typically, this “creep” would stop after a few seconds, with the camera now positioned half a frame away from where I wanted it. It doesn’t take too long to grow weary of guessing where you need to lock the head so that the camera eventually drifts into place.
Conclusion
Although these tripods are available for a song and continue to be popular among entry-level photographers, in my opinion, I’d skip them and move up at least to something like the Dolica Proline AX620B100, which I’ll cover next. The Velbon is certainly better than nothing, though, so if you’re really in a position to use this or nothing at all, please use the Velbon.
Related articles
- Tripod Shopping 101 (lambertpix.com)
- Selecting the Proper Tripod (mpex-experience.com)
- Always remember your tripod. (geoffwah.wordpress.com)
Comments are closed.

7 Comments