
 On the heels of my great experience with Pixel’s Mago speedlite, I was really excited to hear that Pixel was releasing a flash gun with a built-in radio trigger. I’ve been testing a couple of these units for the last couple weeks, and despite a couple small issues, these look like they could be another great option for budding strobists.
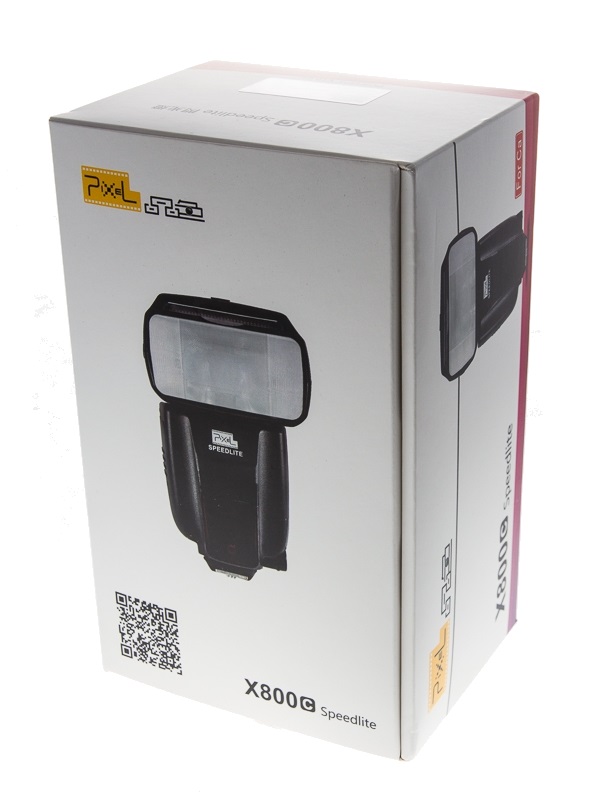
In the Box
My understanding is that the units I received are pre-release units, so there’s every possibility that details of some of the points here could change by the time production units hit the shelves. Nothing about the packaging seemed rough around the edges, though the use of space in the box seemed less than optimal.
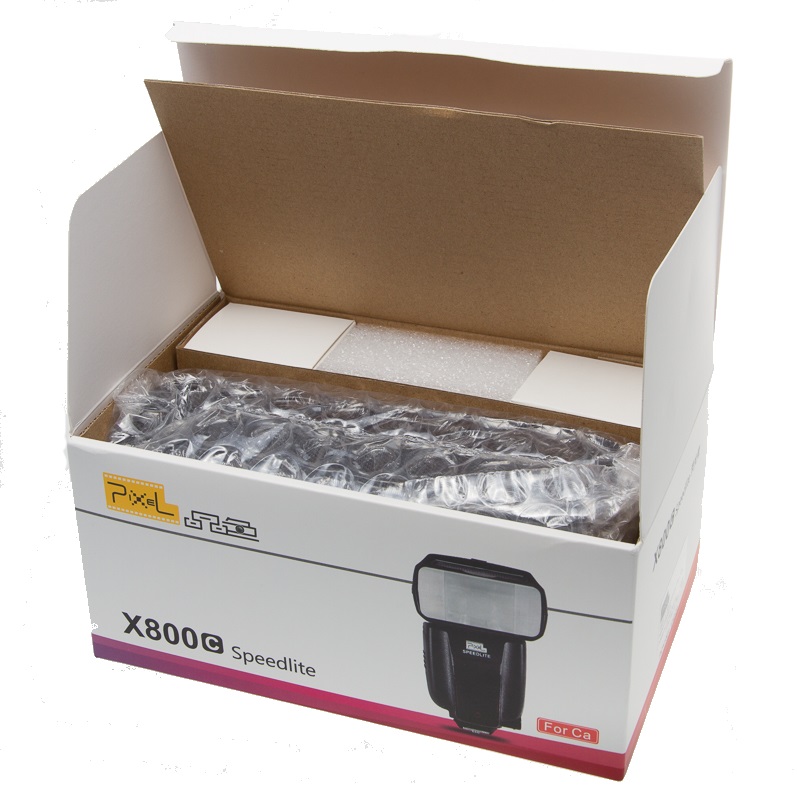 As seen here, opening the box reveals the flash in its protective carrying case (front), and in the back, two small boxes flank a hunk of foam. The foam certainly isn’t hurting anything, of course, but it seems like a more compact box might have been possible.
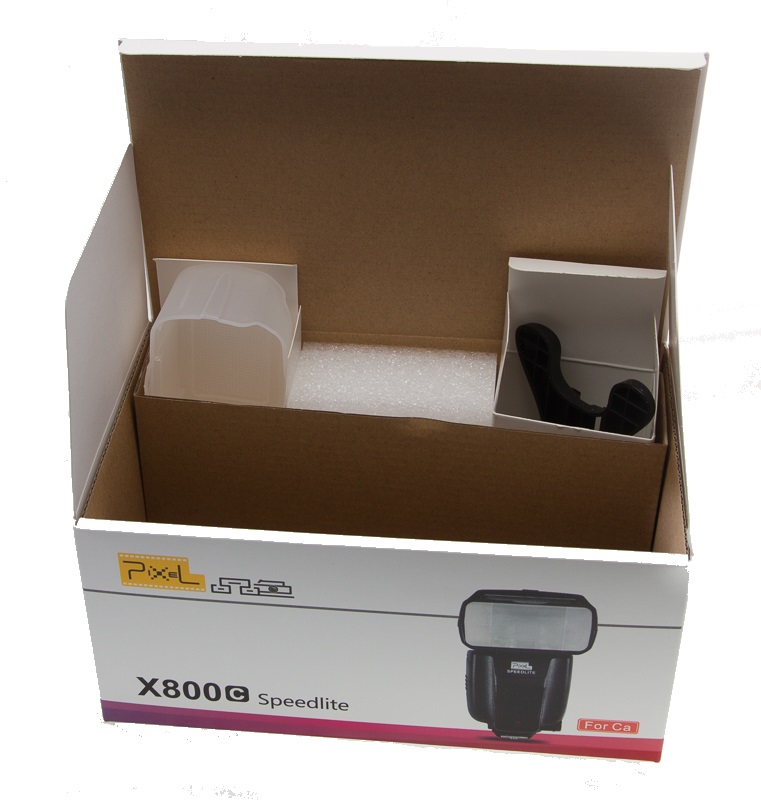 Opening the two boxes reveals a diffuser and stand. The stand is of the same design used for the Mago; the diffuser is not. This isn’t a huge issue by itself, but if you wind up with a couple different kinds of Pixel flash, it sure would be nice to be able to use the same diffuser with any of them. Perhaps more importantly, any brackets you use to attach lighting modifiers, etc., will fit in the same place that diffuser fits, so having a standard size here would be really nice.
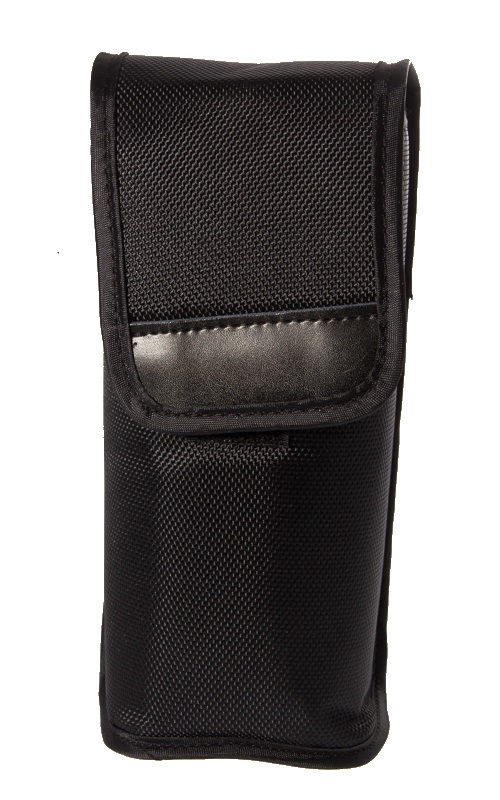 Next, opening the bag at the front of the box reveals a nylon case very similar to the Mago’s. Like the Mago’s case, there’s a convenient pocket inside to store the stand, and like the Mago’s case, it’s not quite big enough to hold the flash with the diffuser attached.
 Unlike the Mago’s case, this one has a nifty hybrid belt-loop attachment on the back which works both horizontally and vertically, and can be attached by velcro if you have a strap that won’t slip through the slot – a very nice touch. Hopefully, the velcro on the front will be a little sturdier than on the Mago’s case, as that velcro is pulling loose after a few months.
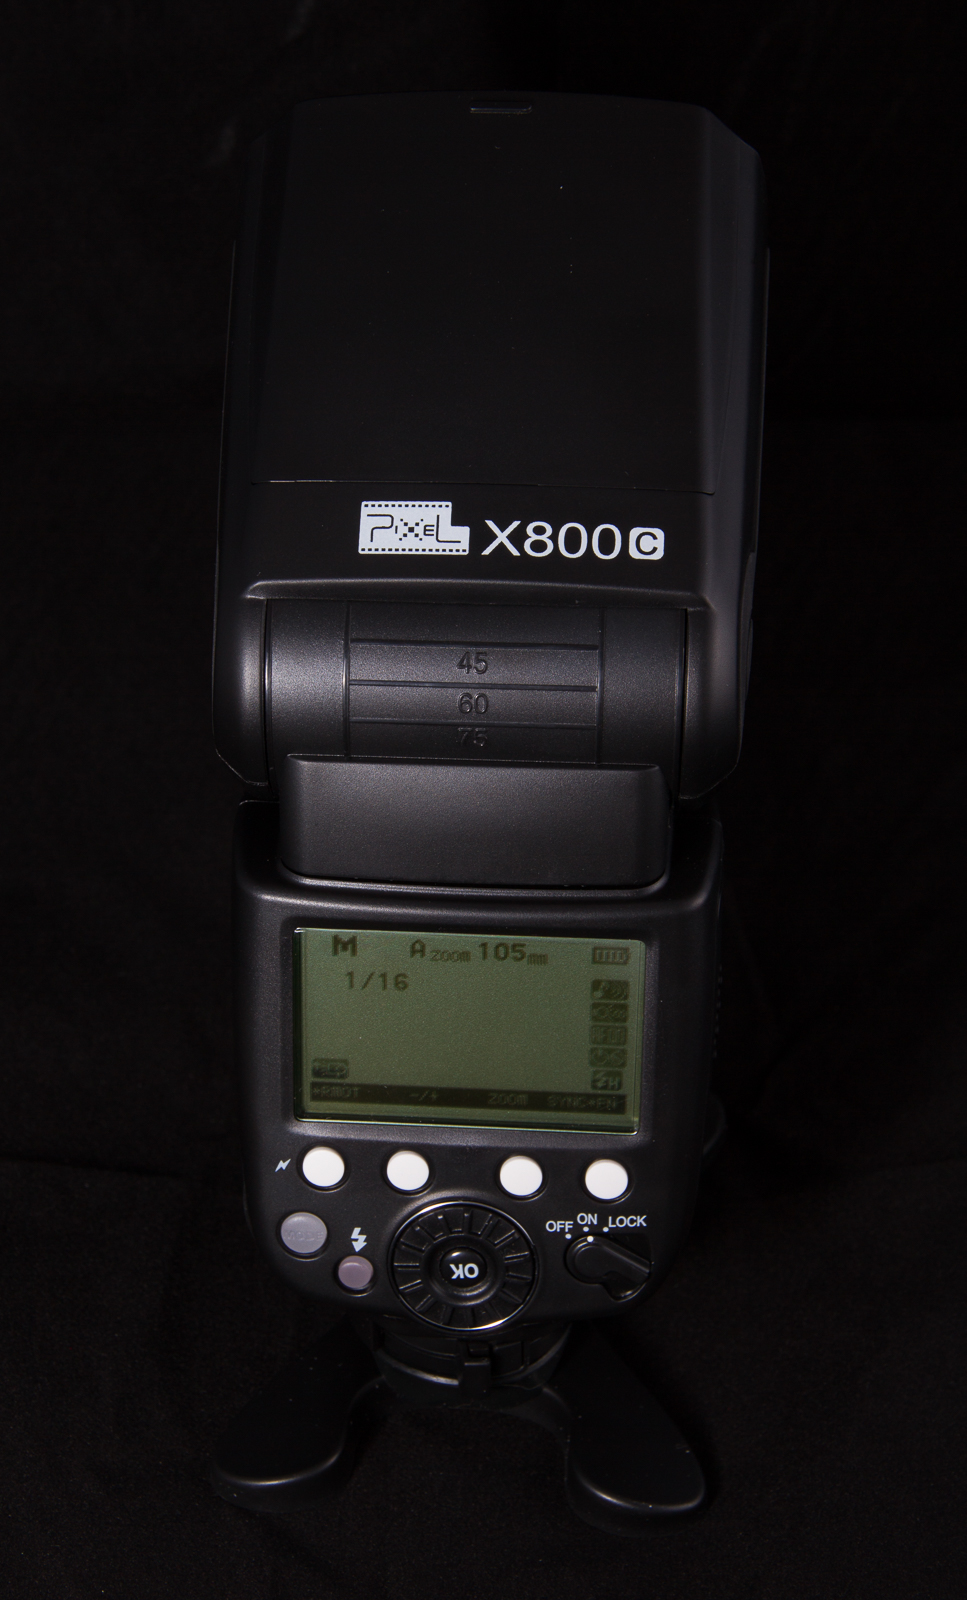 On to the flash itself — it’s fairly similar to the Mago, which is to say it bears a strong resemblance to Canon’s 580EX speedlite. Like most high-end speedlites, it’s got a tilt & swivel head with a zooming internal reflector that can focus the strobe output to match the focal length of your lens.
 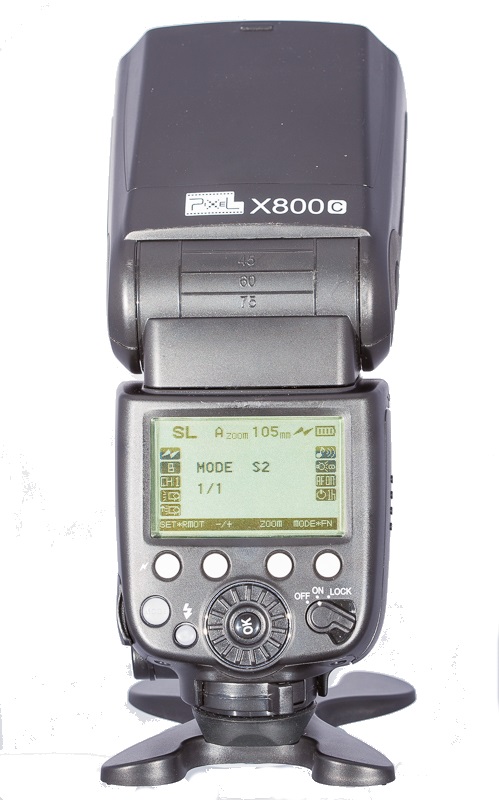 The X800C uses a quick-release foot similar to the one found on the Mago, though I did experience a bit of looseness on one of these, causing a misfire on my camera. I’d expect this to be a pre-release sort of issue — hopefully this will be brought up to the excellent quality level I’ve seen on the Mago. Like the Mago, this foot has a rubber boot that should provide a measure of weather sealing.
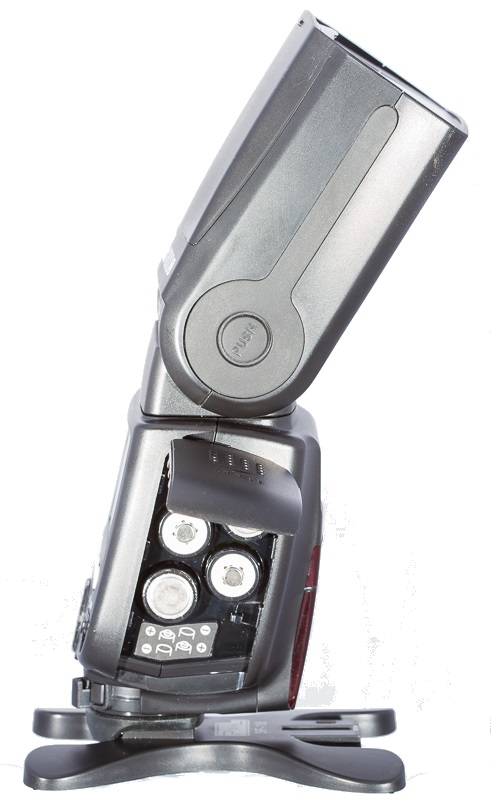 Moving around to the side of the X600C, the battery compartment is solid, easy to operate, and well-labelled. If you’ve ever tried to read the raised-plastic battery insertion diagrams on a device like this in dim lighting, the high-contrast diagram on this flash will be a welcome sight.
Also seen on this side of the X800C is the button that locks the tilting head at zero degrees and ninety degrees. While I like the rubberized texture of the button and the strip extending out toward the tip of the flash (as it makes the flash easy to grip), and the button seems to be nicely sealed, I’m really not a fan of the locking mechanism itself. I really never found it beneficial to have the head locked, and it occasionally turned a one-hand motion into a two-hand operation. I know this feature emulates the locking mechanism on Canon’s 580EX, but ergonomically, it just doesn’t do anything for me.
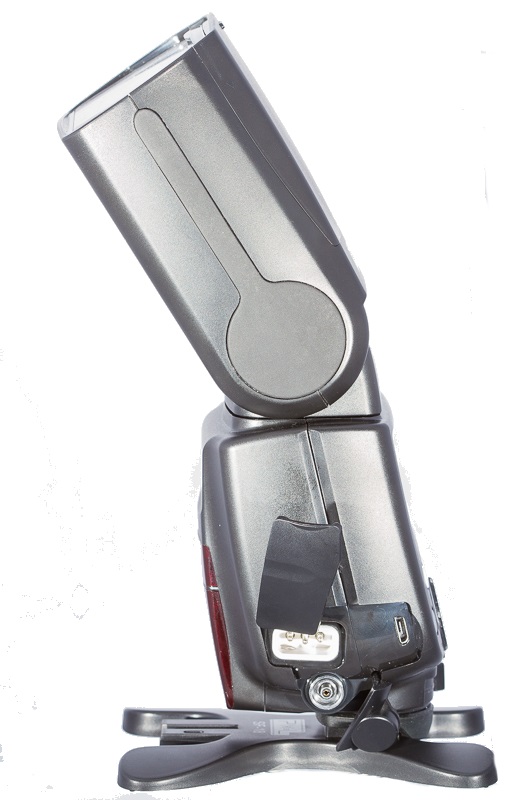 Rotating around to the other side of the flash, the rubberized grip is seen again, though without the release button here (departing the 580’s design). Also seen here are the socket for external power and a USB port for firmware updates, and a PC sync port. The covers for these openings aren’t as easy to operate or as firm to engage as the battery cover, however. Both covers are made of rubbery plastic. I found the top cover sealed fairly well, but could be tricky to seat well. The bottom cover (for the PC sync port) was loose on one of the flashes, popping open on its own a couple of times.
Compared to the Mago
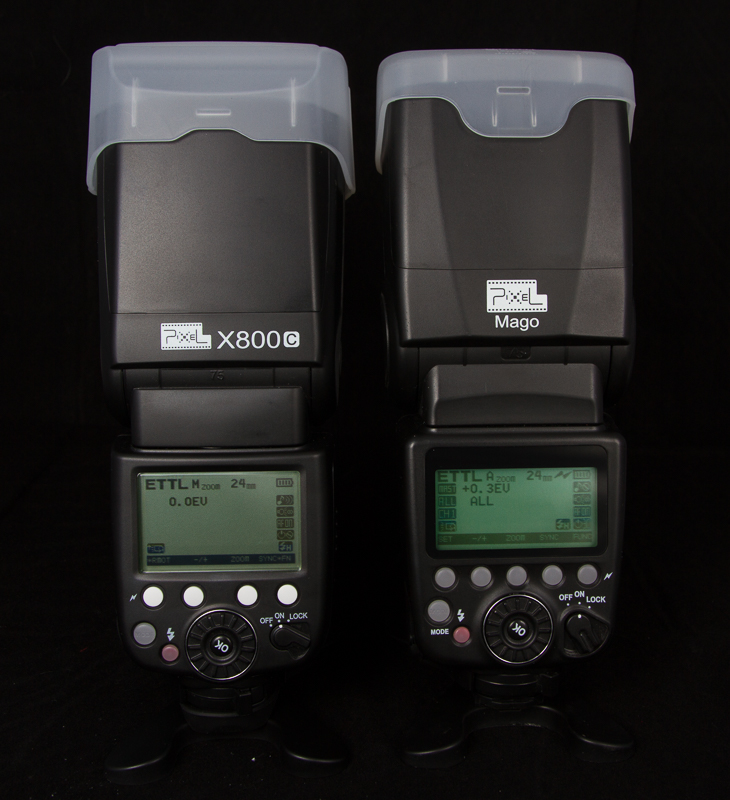 I was really blown away by the Mago when I reviewed it, so I was anxious to compare the new X800C to the Mago. Cosmetically, they’re pretty similar, but the minor differences I saw were a little curious. Seen here side-by-side, the X800C is actually a little shorter than the Mago, but its larger diffuser sticks up a bit. The X800C’s LCD screen is a bit larger, but despite the addition of the radio master-slave capabilities of the newer flash, it makes do with one fewer menu button… more on that later.
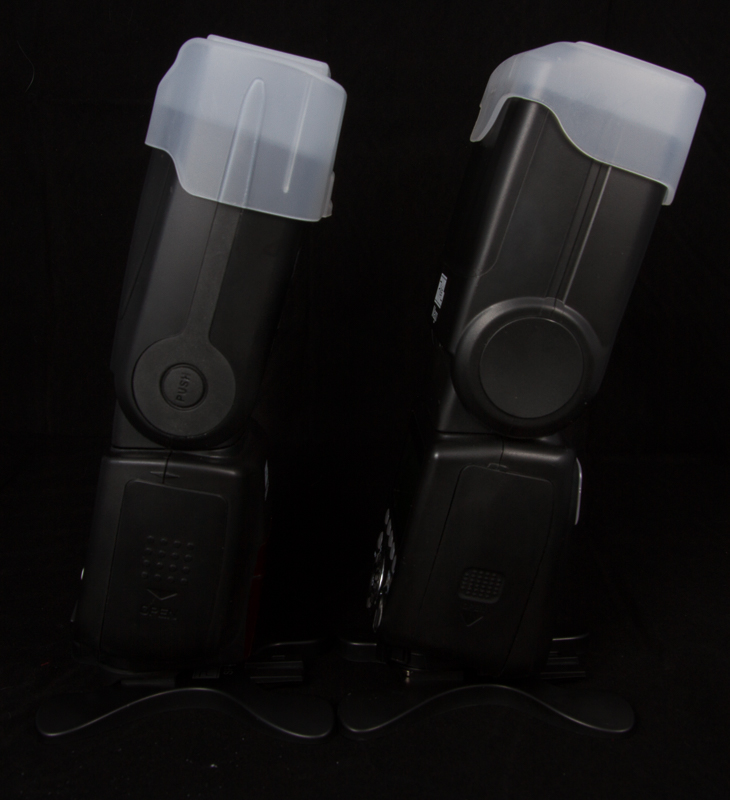 Seen from the side, the X800C is visibly slimmer than the Mago, especially around the tilting mechanism and base. The Mago’s larger tilting mechanism lacks the locking button of the X800C, but as I mentioned, I really preferred the stiffer mechanism of the Mago without the lock.
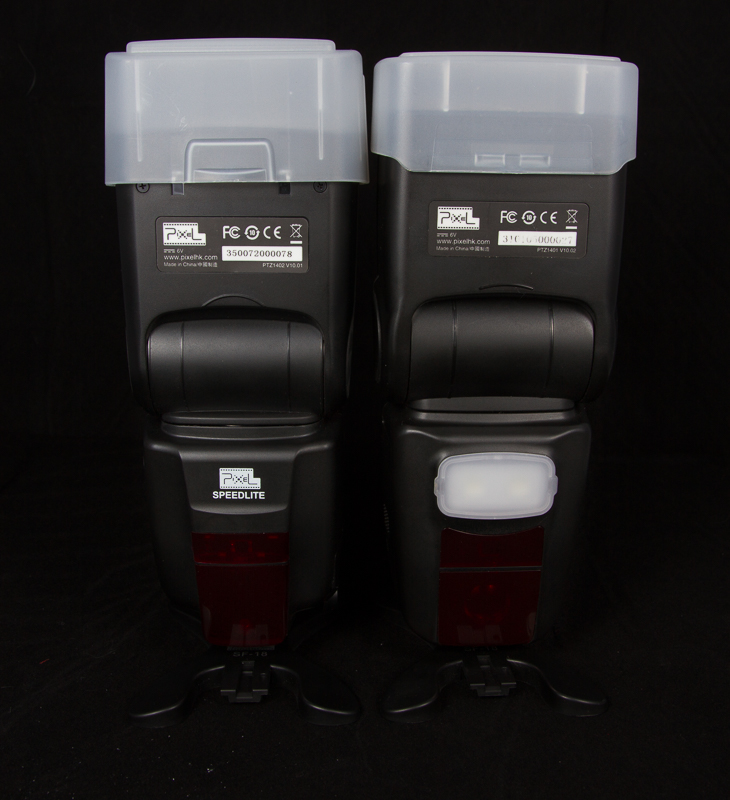 On the front of the flashes, you can see that the X800C is missing the modeling LED lights of the Mago — nominally a small price to pay for the addition of the radio trigger, in my opinion, despite the fact that I’ve managed to put those lights to good use on a couple of occasions.
 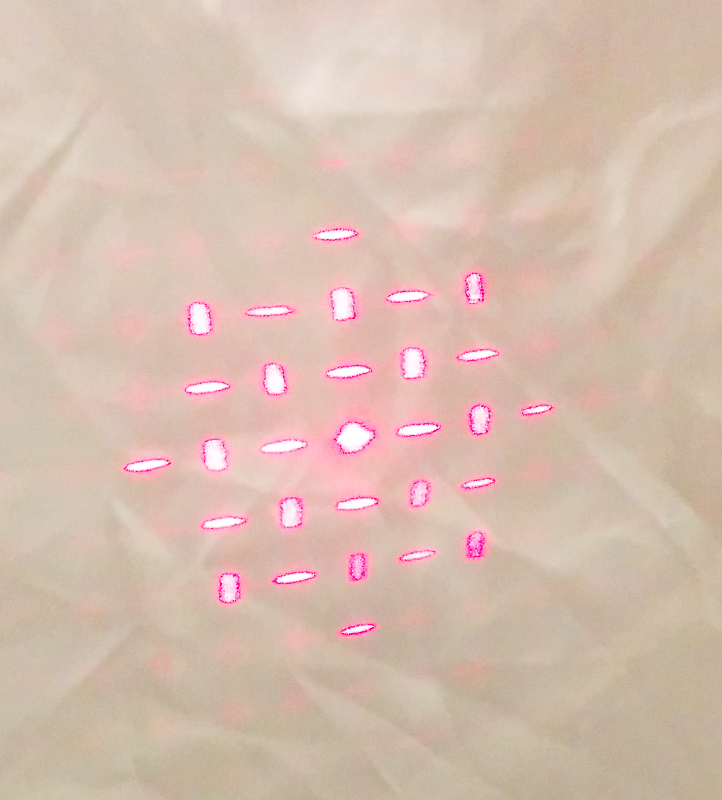 Once again, the larger diffuser of the X800C is clearly visible here, and the clear red panels on both flashes house infrared receivers and focus-assist lamps. At right, you can see the pattern thrown by the X800C, which comes in handy in low-light settings. The cross-hatch pattern is intended to give the camera some additional contrast to help it focus, and I’ve found it fairly effective. You should note, though, that this pattern (like those on other flashes and triggers) will absolutely be visible to your subjects — one person remarked that he felt like an extra in the Predator movie!
X800C Features
The features & specs of the X800C are similar to the earlier Mago – the most notable addition being the built-in radio trigger.
- Flash Index – 60M@ISO 100/105mm
- Flash Mode – ETTL /M / Multi
- Auto Zoom / Manual Zoom: 20 – 200 mm
- HSS to 1/8000th
- 2.4GHz Radio Transmission – Master and Slave Modes
- Canon Optic Wireless – Master and Slave Modes
- S1 and S2 Optic Slave Modes
- 1st Curtain Sync / 2nd Curtain Sync
- FEC / FEB – 1/3rd Increments (±3 stops)
- Manual Flash – 1/128 – 1/1 output control (1/3rd increments)
- AF-Assist Light
- Sound Prompt
- High Definition Dot Matrix LCD Screen
- USB Port – Firmware Upgradable
- External Power Pack Input (Pixel Style Socket)
- PC Sync Port
- Full Head Tilt & Swivel – UP/Down: -7/90 degree Left/Right: 180/180 degree
- Long Life Flash Tube
- Flash Recycle Time – aprox 2.8 sec (1/1 full power output)
- Internal Power Source – 4 x AA size batteries
- Flash Times – 180 times (1/1 flash output, with Sanyo Eneloop batteries)
- Overheating Warning – multi dot-matrix temperature control, battery & tube overheat warning.
- Dimensions – 78.04mm × 60.50mm × 193.00mm
- Weight – 408.7g (excluding batteries)
Quick Testing
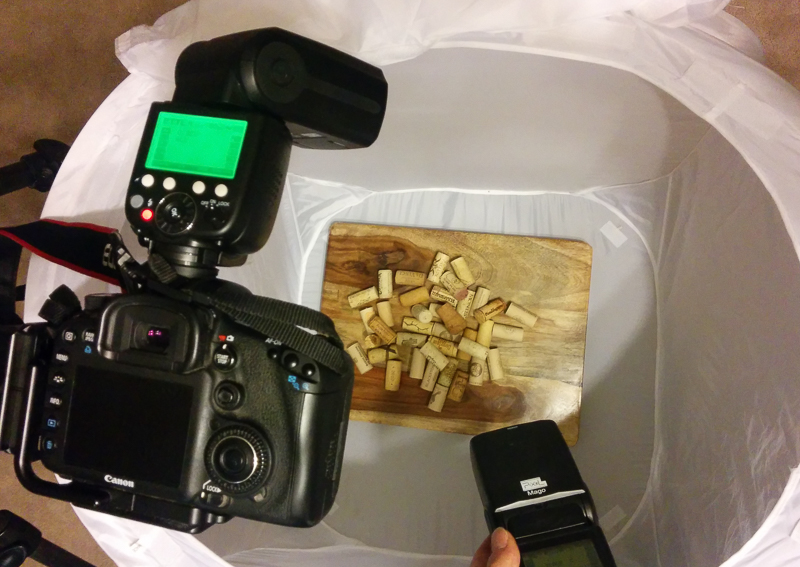 As you might imagine, the feature I was most anxious to test was the wireless master-slave function. As these flashes came to me in the midst of a particularly crispy cold snap, I spent a fair amount of my early testing time playing with still-life settings with a 2′ light tent.
 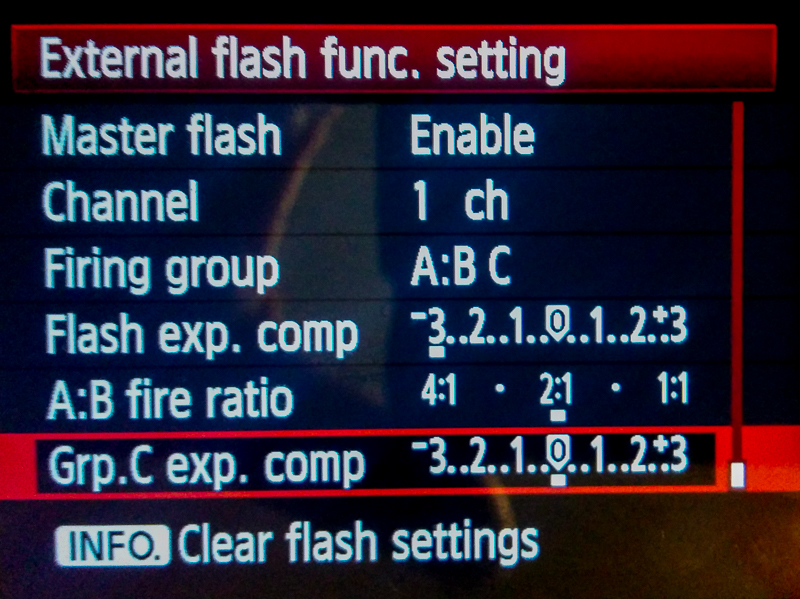 Here, I’m hand-holding a flash that’s bouncing into the interior of the light tent, with the on-camera flash directed at the subject. When using a flash on camera, it’s always in group “A”, incidentally, so the settings at the left result in a 2:1 ratio of A to B using the flashes in E-TTL mode.
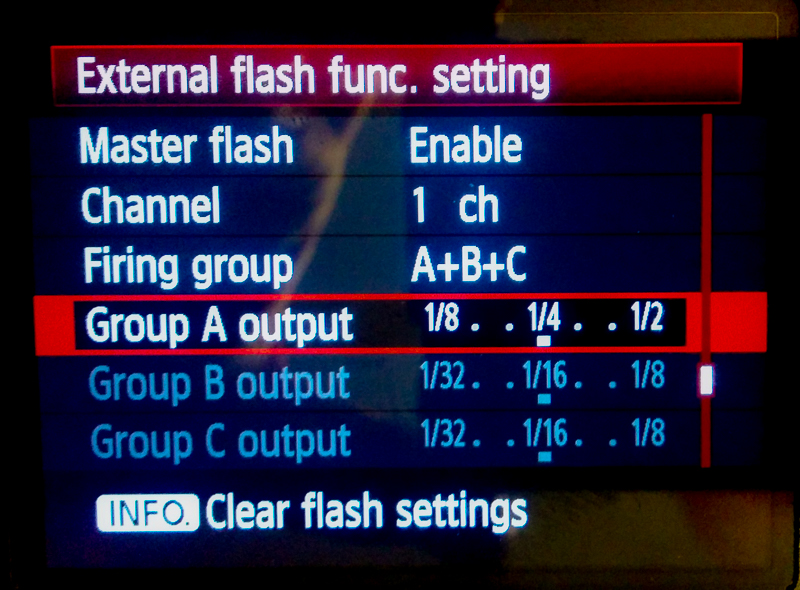 Although E-TTL is really great for a lot of dynamic scenes, for static scenes like this, it’s often preferable to have a little more direct control over flashes, and the master-slave capabilities of the X800C allow that, too. As shown here, in fact, the “A” group master on the camera is actually set to optically trigger another X800C and a Mago, which doesn’t have the 2.4Ghz radio, but works great as an optically-triggered slave. All three lights were used here to create a brightly-lit scene in a particularly dreary room.

Compared to….
One of the things I was interested in was trying to test the E-TTL metering achieved with the Pixel X800C vs a couple other E-TTL flashes. Using an E-TTL flash, in case you’re not already familiar, achieves a remarkable coordination between flash, lens, and camera body, so the performance seen here is very much a cooperative effort between the flashes and my 7D. For more background on E-TTL, here’s an excellent article from Canon, and another from Chuck Gardner. Both are well worth checking out if you have any interest in how this magic occurs (which can be handy when you’re using it).
For these tests, I shot each of the two copies of X800C I received from Pixel, as well as the Mago I reviewed last year, and a Yongnuo YN-568EX II — all of which are E-TTL capable flashes. The main purpose of these tests wasn’t to test flash output — rather, I wanted to see if metering varied from one flash to the next. In the sake of simplicity, each of these shots uses a single flash only, mounted on the hotshoe in E-TTL mode.
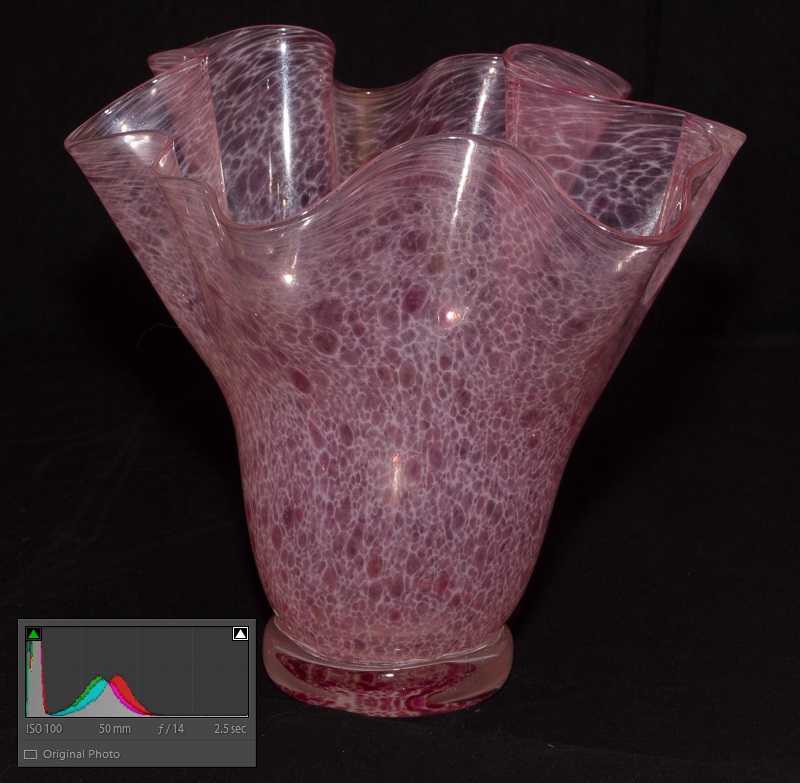
Shot 1: Exposure compensation -2.0Ev, flash exposure compensation -1.0Ev. Having started this test with both EC and FEC dialed down to suit the Pixel, I was interested to see the Yongnuo flash underexpose quite a bit. In subsequent tests, though, I found that with EC closer to zero, the Yongnuo did a better job of exposing well, and the Pixel flashes were a little too bright.
Pixel X800C#1:
Pixel X800C#2:

Pixel Mago:
Yongnuo YN-568EX:
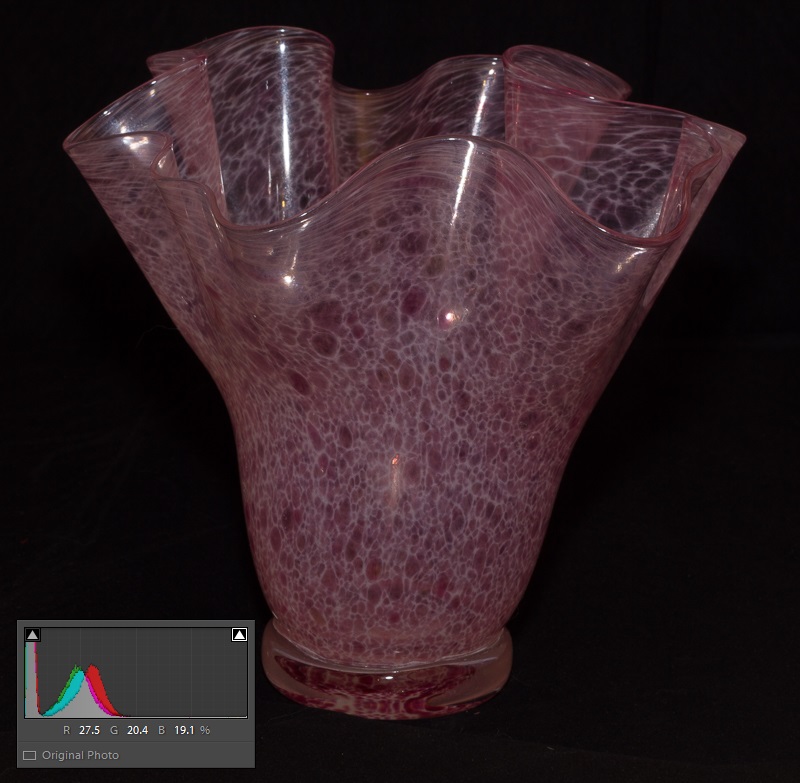
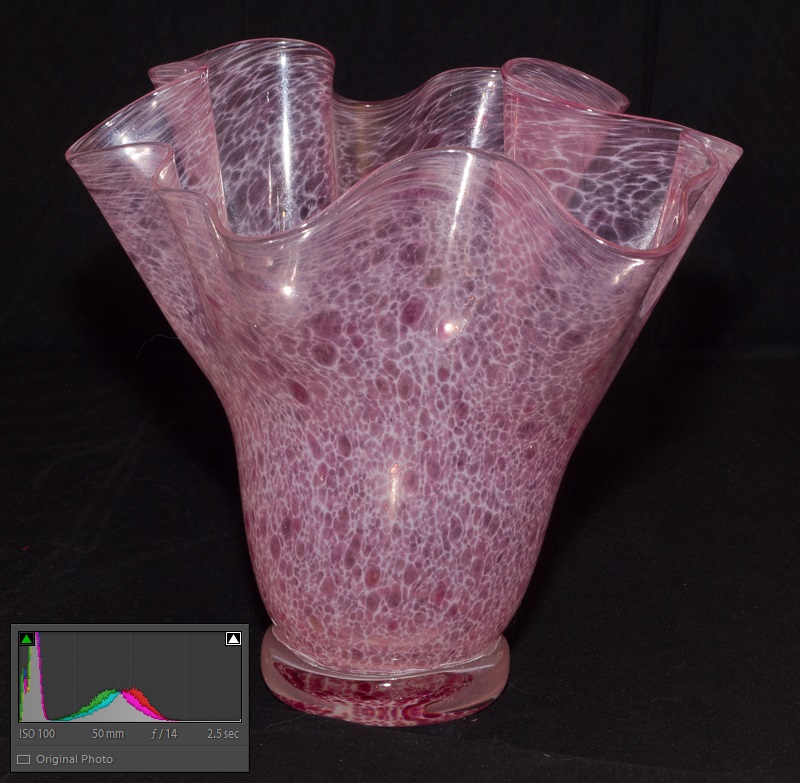
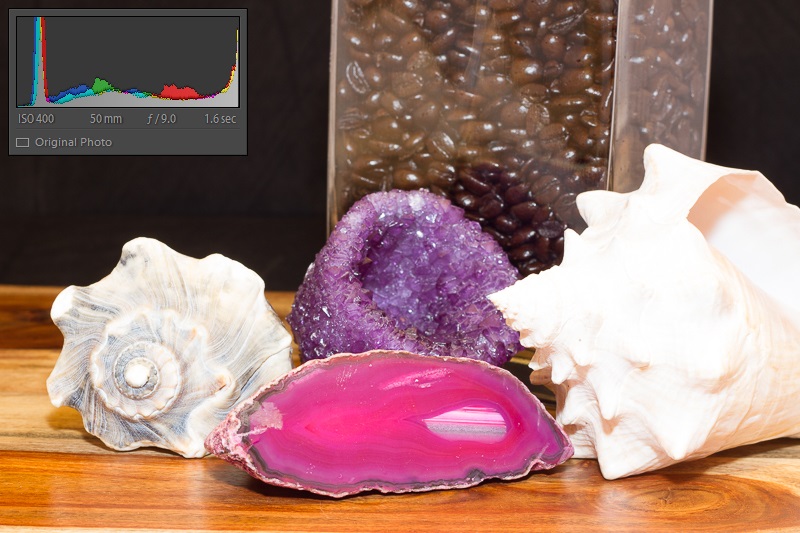
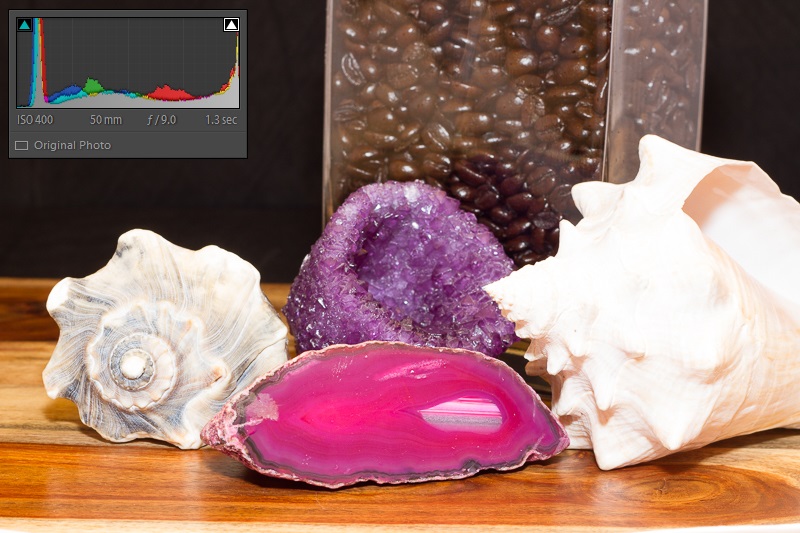
Shot 2: Exposure compensation 0.0Ev, FEC 0.0Ev,
Pixel X800C #1
Pixel X800C #2
Pixel Mago
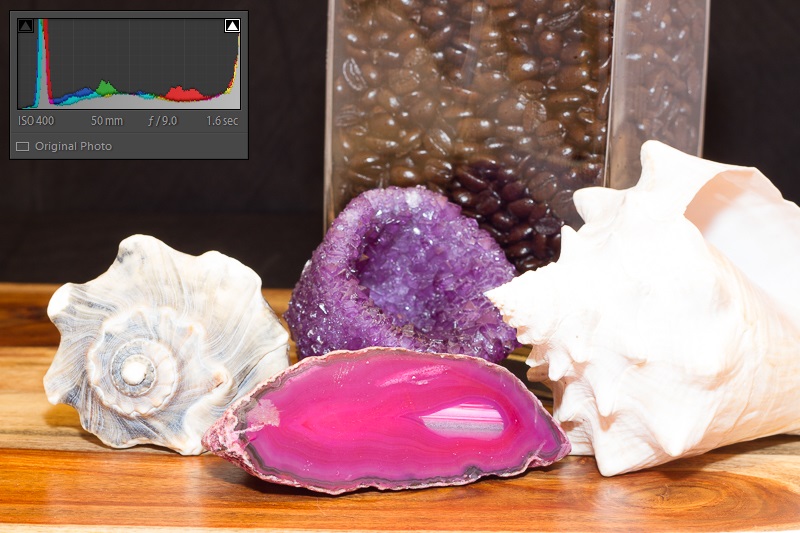
Yongnuo YN-568EX

This last shot is especially telling, I think. As shown in the histogram, there’s no highlight clipping due to overexposure, the colors are richer, and there’s more detail visible in the light-colored shells. Obviously, the same lighting should be possible using the Pixel flashes if you play with EC and FEC, but given that the whole point of E-TTL exposure is to have the flash help you set exposure properly, the Yonguo flash is doing a better job of exposing properly.
Shooting with the X800C
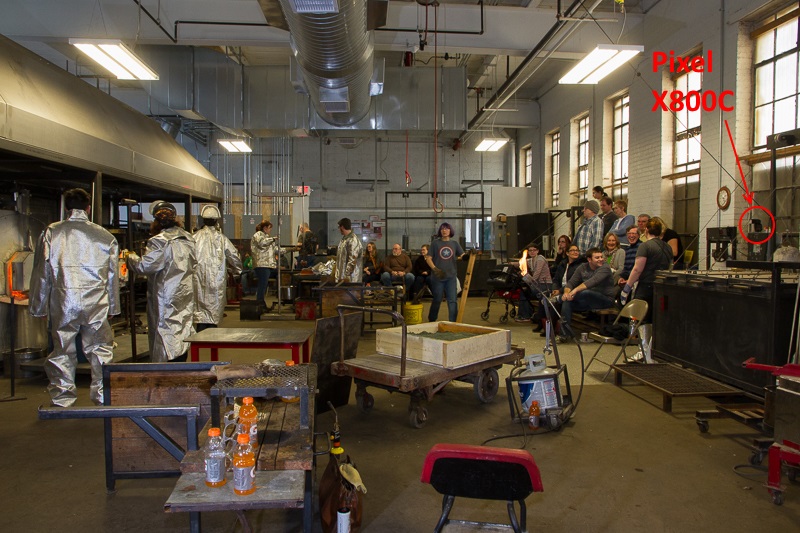 Compared to the Mago, the radio trigger of the X800C is clearly the most notable new feature, and I tried to give it a thorough run-through. I’ve found flash to be a great tool for evening out settings with great dynamic range, such as this glass-blowing demonstration. Here, even though the room appears well-lit, I knew that when I was facing the glass ovens, I’d have trouble exposing for the people in front of me without blowing out the fire in the ovens. Since I was expecting to move around the room a fair bit, I set up one of the Pixels facing the ovens so I could trigger it when needed (see red text & arrow above).

This is a still-life facing the ovens — the implements in the foreground are much more evenly lit from the front here, which keeps the oven from blowing out completely. The next two photos were shot earlier that day, but the idea is the same.
[clear]

[clear] The e-TTL support on the X800C also allows the sort of subtle control needed to put a little glint and crispness into these photos without them necessarily looking like they were shot with a flash. This is another shot that would very likely have no detail at all in the shadows without a little help from the flash, but a minimal use of flash lets the ambient light from the furnace supply the majority of the light for the photo. Obviously, something like this could be done by setting flash power manually, but I find that when I’m in settings like this where lighting conditions are changing rapidly, e-TTL metering and flash control are a big help.
 Coincidentally, I had a chance to shoot at another glass studio about a week later — here, the X800C is used to throw a shadow across these crystals, shot up close to resemble a yellow-green sand dune. The way the artists used these powders during the process of sculpting their work was really fascinating — a very different technique than I’d seen previously.
 Here, I’m using the flash to pop the highlights in the background of the scene to create the “bokeh balls” seen in the upper part of the photo. This is another case where easy off-camera usage comes in handy, as I wound up waving the flash all over to get the effect I was looking for.
 The finished product, at right – here, the flash is used more traditionally to provide a little fill lighting for the subject. The diffuser provided with the X800C was used here to keep the light from reflecting too harshly off the glass.
I did experience some usability challenges while shooting the more “event-type” subjects. One of the flashes had a hard time seating correctly on the hotshoe of my Canon 7D, so depending on which flash was mounted on the camera, I’d see problems with misfiring. I chalk this up to pre-production variances, but it’s something I’d keep an eye on as production flashes start hitting the streets.
I also found the UI of these flashes to be fairly confusing, though, due most likely to the fact that these flashes have more functionality than the already-busy Mago, and they’ve got fewer menu buttons with which to control that functionality. I’m not sure there’s a super-easy way around this, given the stuff that’s crammed into these flashes. In settings where you’ve got a minute to set up the flashes and verify they’re working correctly, this tends not to be a big deal, but when you’re operating in a hurry, usability comes to the fore, and that just creates a huge challenge for the X800C. I think a big step in the right direction would be some sort of visual indicator showing when one or more of these units are “connected” to one another, as this was a source of particular challenge for me, and I honestly got pretty tired of pointing the flashes at myself and firing test shots to see if each of the flashes was firing.
To be fair, I did find that being able to work with flashes without having triggers hanging off of them got to be pretty appealing. Not only the lack of bulk, but having fewer actual pieces of equipment, fewer sets of batteries, and so on, was really, really nice. If this flash (or one like it) finally attains the usability of a dedicated trigger, I really appreciate how nice it’ll be to skip the trigger. I’m sold.
Moving on, as you might have guessed, I do enjoy the occasional macro subject, and these last two are also macros. Unlike prior cases where subtle flash control was needed, in both these cases, I needed a pretty substantial boost of light. Using both Pixel X800C flashes, I lit these scenes at dusk to make the photos appear as if they were shot in daylight.
 Here, with the camera low to the ground, the flash on the camera’s hotshoe is angled up at a reflector above the flower (giving a soft light to the whole scene), while the second X800C is held at camera left to light the flower and stems specifically.
 In this final shot, I fired the X800C by hand multiple times during the exposure to “paint” the scene with light.
Conclusion
Like the earlier Pixel Mago, the Pixel X800C represents a pretty fantastic value proposition. Having given up precious little vs. the previous Mago, the X800C adds fully-functional 2.4GHz master-slave radio trigger capabilities, all in a package that’s slightly smaller than the Mago, if you can believe that.
Perfect? Not quite. In addition to some of the pre-production issues I saw, I’m not a huge fan of the new head locking button, and I’ve got some real concerns about the usability challenges introduced as more functionality was added into a chassis with one fewer (!) buttons than the Mago.
There’s a huge potential appeal here in getting this kind of capability out of a single unit, which avoids a separate trigger purchase and cuts down on bag clutter, batteries to carry, and so on. I think if Pixel can clean up a couple of these issues before the X800C ships, they might have another winner on their hands; otherwise, I’d consider sticking with the Mago and separate triggers — not because the X800C has any really fatal flaws, but because I still consider the Mago to be that good. I’ll update this review if I learn of updates from Pixel to address these things, of course, and when pricing becomes available, there’s always a chance that could factor in as well.